 QuickMovie
← Back to the editor
한국어
QuickMovie User Guide
Last updated: 2026-10-07
QuickMovie is a free online tool for making and editing video right in your browser — nothing to install. Your video, photo and audio files never leave your computer. It works best in Chrome or Edge on a PC.
Quick start (5 steps)
- Make a video: click Webpage → Shorts and paste the URL of your own blog post, or drop a video file onto the page (or use Add video).
- Cut: drag on the timeline ruler to delete the parts you don't need.
- Add captions: drag on the subtitle row where the text should appear, then type it.
- Tune speed and music: choose playback speed (1×, 2×, 3×) and background music.
- Export: save as MP4, or save a .qm project to reopen and keep editing later.
1. Make a video from a blog post URL
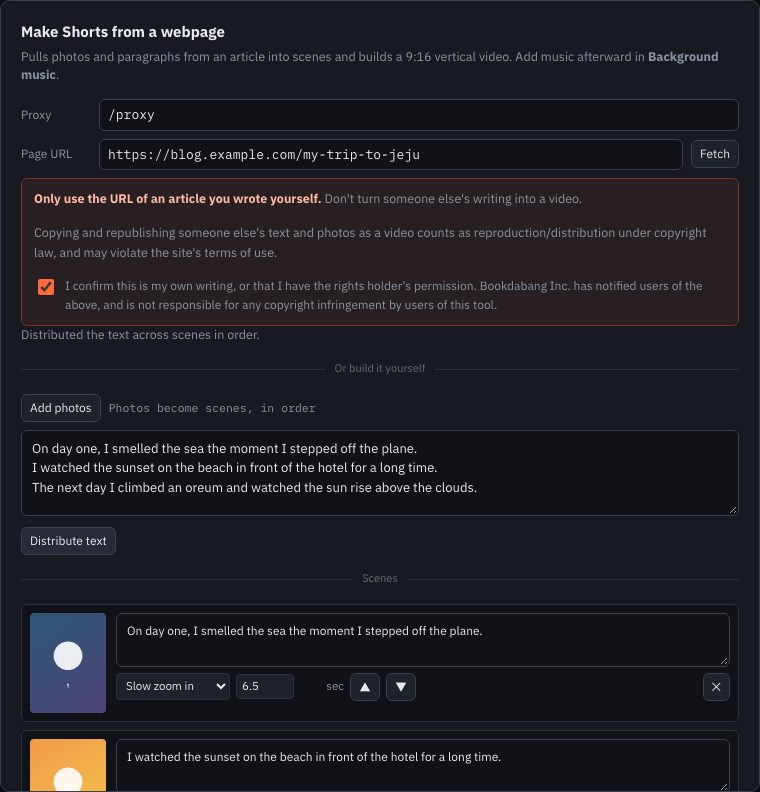
Paste the address of your own blog post made of photos and text. QuickMovie splits the photos and paragraphs into scenes and prepares a 9:16 vertical (shorts) video.
- Click Webpage → Shorts at the top.
- Paste the post address into Page URL.
- Tick "I confirm this is my own writing, or that I have the rights holder's permission."
- Click Fetch. Photos and paragraphs appear as scenes in the Scenes list.
- For each scene, edit the bottom text, the duration (sec) and the motion effect (slow zoom, slide in…). Use ▲▼ to reorder and ✕ to remove.
- Click Add to timeline to send the scenes to the editor.
Build it by hand (no URL)
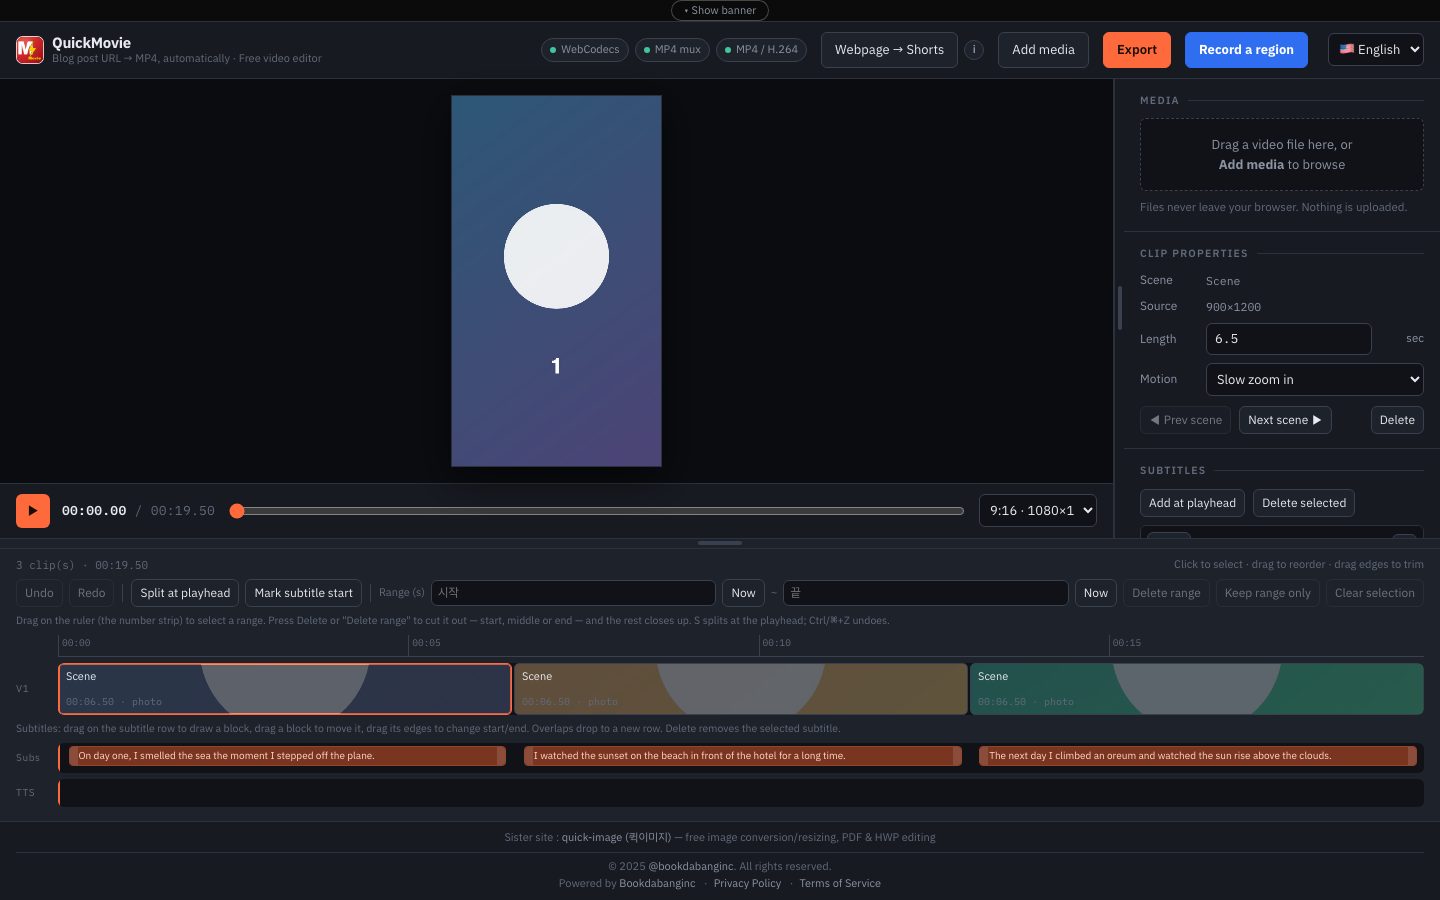
- Use Add photos, paste paragraphs separated by line breaks, then click Distribute text to place the text across the photos.
- Use Save draft / Load draft to store the scene list and continue later.
- Add music afterwards under Background music.
2. Cutting video (trim, split, restore)
First click Add video or drop files onto the page (.mp4, .webm, .mov …). The video appears as a clip on the V1 row.
Select a range and delete it (start, middle or end — same way)
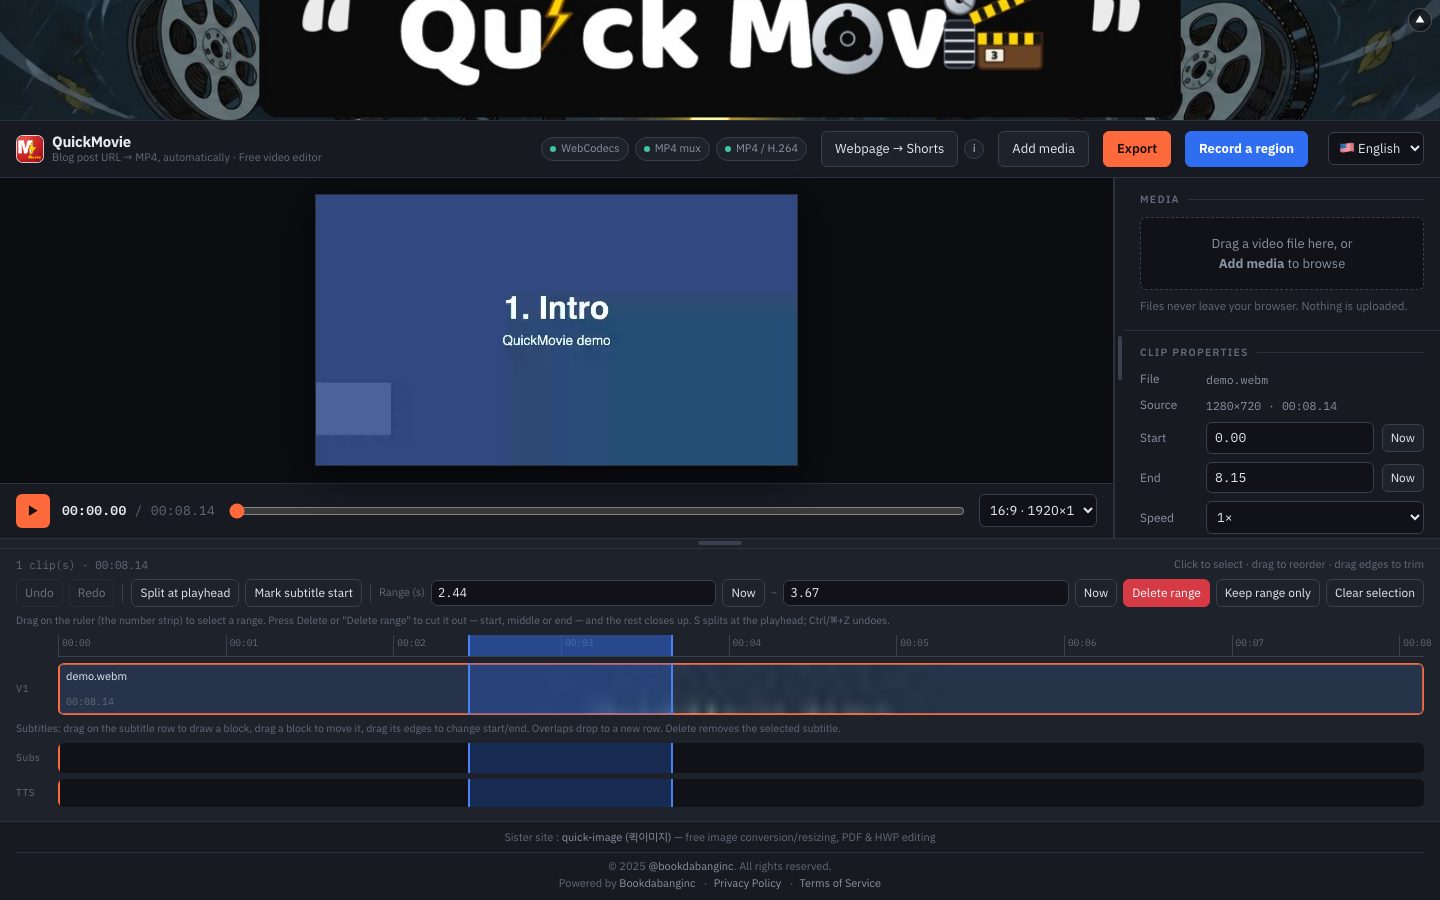
- Drag across the ruler (the number strip) at the top of the timeline. A blue range is selected; drag its ends to adjust.
- For exact times, type them into the Range (s) boxes, or play the video and press Now at the position you want.
- Press Delete range (or the Delete key). The range is cut out and everything after it closes up. Keep range only does the opposite.
Split · undo · restore
- Split at playhead (S key): splits the clip in two at the playhead.
- Undo / Redo (Ctrl/⌘+Z, Shift+Ctrl/⌘+Z) reverts deletions, splits and clip-length changes.
- Drag clip edges: pull the left or right end of a clip to shorten it — and pull it back out to restore.
- Reorder clips: drag a clip onto another clip.
- Analyze silence: finds silent stretches automatically and removes them in one go (undoable).
You can resize the panels by dragging the handles between them (both horizontal and vertical; double-click to reset).
2-1. Resizing and cropping the video (removing corner marks)
You can grab the video right in the preview to crop it or scale it up — handy for cutting off a corner mark that an AI video tool adds (for example a star in the bottom-right).
- After adding a video, press ✂ Crop video size at the top right of the preview, or double-click the video. A yellow outline appears and the preview gets larger.
- Drag the white squares in the middle of each side to crop that side. For example, push the bottom square up to cut off the bottom.
- Drag the yellow dots on the corners to make the video larger or smaller while keeping its proportions. After cropping, drag a corner (for example the bottom-right) to stretch it back to fill the frame.
- Drag the middle of the video to move it.
- Fill the frame in the top bar scales what's left to cover the whole frame. Reset restores the original, and Done (or Esc) finishes.
- Undo (Ctrl/⌘+Z) works, and the result is kept in exported MP4 files and in .qm files.
- Clips split from the same video share the same crop. Photo scenes aren't supported.
- Black or white bands around the picture can also be trimmed with Remove borders in the right-hand clip panel.
Note: removing watermarks or logos from someone else's video may violate copyright and terms of use. Use this only on videos you made or have the right to use.
3. Adding captions
Draw captions right on the subtitle row of the timeline while watching the video. It is always in sync with the Subtitles list on the right.
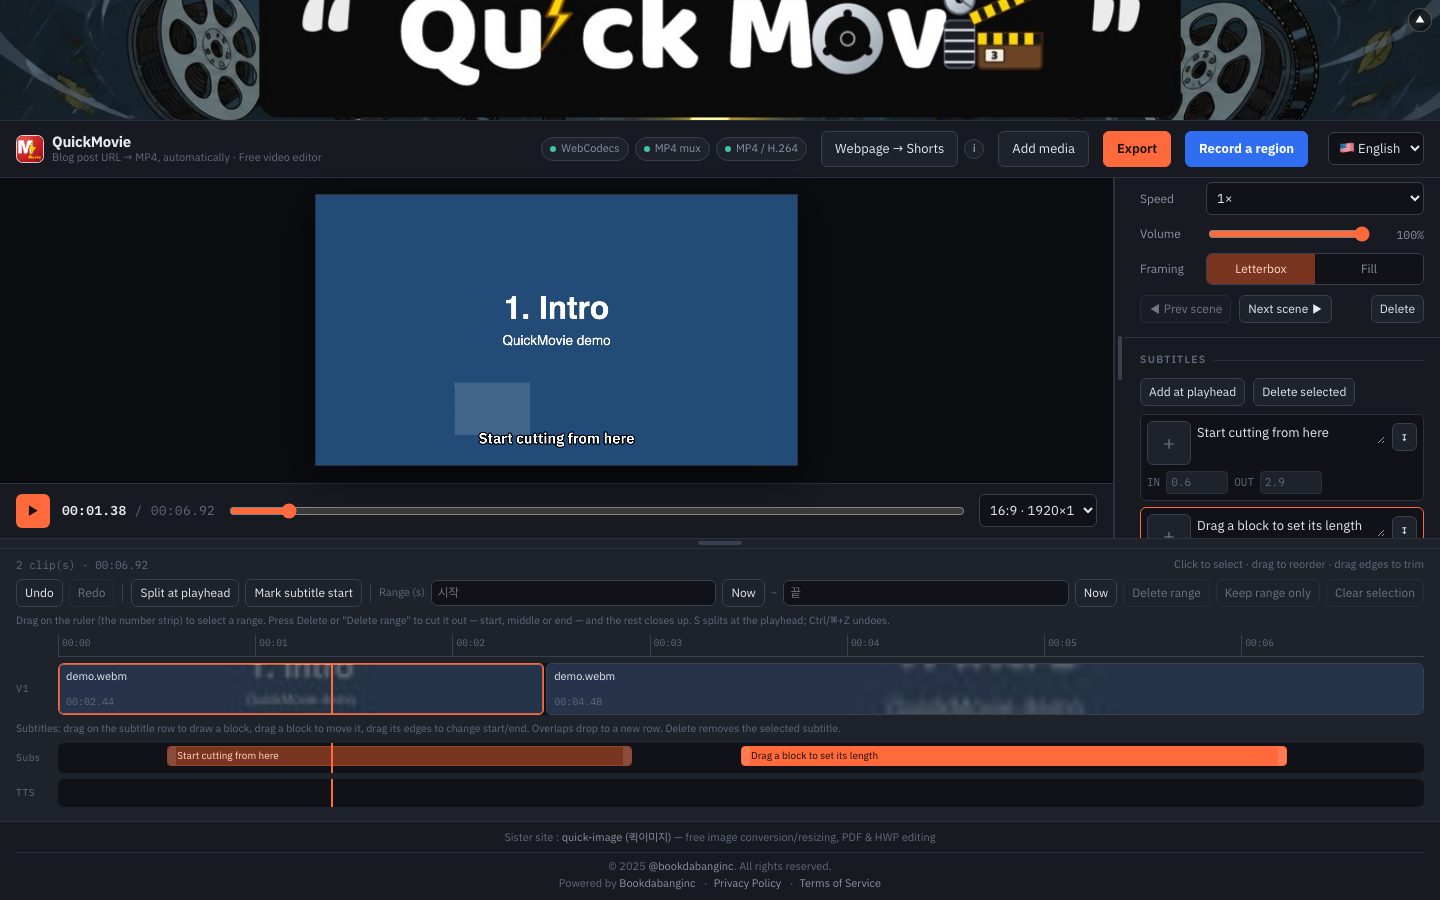
- Drag on an empty spot of the subtitle row to create a caption block for that span, then type the text in the list on the right.
- Drag a block to move it; drag its ends to change start/end. Edges snap to the playhead and to other captions.
- Overlapping captions drop to a new row so you can see them all; placing them end to end on one row also works.
- To set them while playing, press Mark subtitle start, play, and press Mark subtitle end where the caption should finish.
- The IN / OUT number boxes in the list still work for exact times.
Styling
- Pick font size, position (bottom–top) and font in the Subtitles panel.
- You can attach an image to a caption (the + box).
Automatic captions
- Auto captions · STT: turns speech into text. The model downloads once into your browser; audio is not sent anywhere.
- Extract on-screen subtitles (OCR): reads Korean/English text already burned into the picture and uses it as caption/narration text.
4. Changing speed (1×, 2×, 3×)
Under Output → Speed in the right panel choose 0.5× · 1× · 1.5× · 2× · 3× · 4×. It applies to every video clip at once and is baked into the exported MP4. Caption and narration start times shift to match the new length.
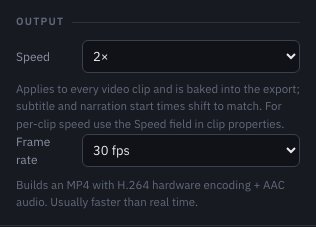
- For a single clip, select it and change Clip properties → Speed. If clips differ, the Speed box shows "Mixed".
- Photo scenes are not affected. Speed changes can be undone.
5. Export MP4 · save .qm and re-edit
Press Export at the top and choose a format.
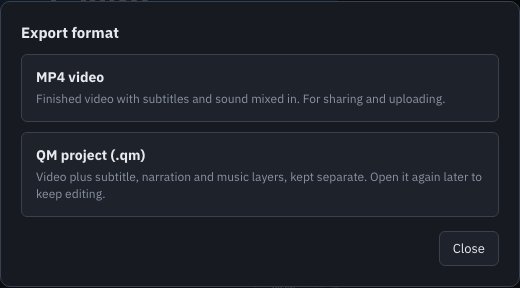
MP4 video
A finished video with captions and sound mixed in — for sharing and uploading. Choose the aspect ratio (16:9 · 9:16 · 1:1 · 4:5) and fps beside the timeline.
QM project (.qm)
QuickMovie's own file. Saving is Pro-only; anyone can open one. It ends in .qm but contains the original video + captions + narration + background music + edit settings (cuts, speed, fonts…) as separate layers. The video is always included.
- Reopen: drop the .qm onto the editor (or choose it with Add video). Video, captions and sound come back as separate layers so you can keep editing — including changing speed to 1×, 2× or 3× again.
- An MP4 has captions and sound merged into one piece, so re-importing it cannot separate them. If you may edit again, save a .qm along with the MP4.
- Because the video is inside, .qm files are large. A single file over 4GB cannot be stored.
6. Record just part of the screen
Use Record a region at the top to share a screen, window or tab and record only the area you choose.
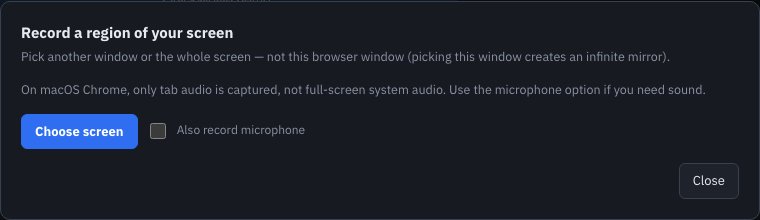
- Click Pick a screen and choose another window or the whole screen (avoid this browser window).
- Drag on the preview to draw the region. Drag inside to move it; drag a corner to resize.
- Choose FPS (24/30/60), then Start recording → Pause if needed → Stop.
- In the result window, Save as MP4 or Import into editor to keep editing.
You can also record your microphone. Recording works only on HTTPS addresses.
7. Narration · music · voice cloning
- Narration · TTS: write the text and click Make voice to add a spoken track. Import from subtitles copies caption text in one go.
- Voice cloning: record or upload your voice and have it read the text. This is the only feature where audio is sent to an external public server (Hugging Face).
- Background music: pick an audio file under Choose audio and set the volume. The original sound ducks automatically while narration plays.
8. Keyboard shortcuts
| Key | Action |
|---|---|
| Space | Play / pause |
| ← / → | Step one frame (Shift: 1 s) |
| S | Split clip at playhead |
| Delete | Delete selected range or caption |
| Ctrl/⌘ + Z | Undo |
| Shift + Ctrl/⌘ + Z (or Ctrl+Y) | Redo |
| Esc | Clear range selection |
9. Accounts and plans (Free / Pro)
You can edit and export MP4 without logging in. MP4 files exported while logged out carry a QuickMovie watermark at the bottom right. Logging in (free sign-up) is needed for the Gemini voice trial and for Pro (watermark removal and .qm saving).
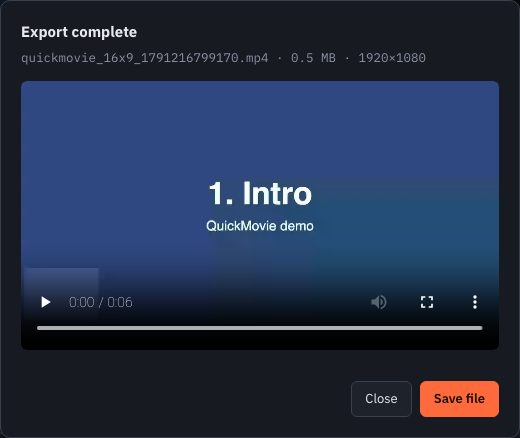
- Click Export at the top and choose MP4 video; it exports right away. Leave the file name blank to save as date_time.
- To remove the watermark or save a .qm project, sign up with the Log in / Sign up button in the header and subscribe to Pro.
| Free account | Pro | |
|---|---|---|
| Editing, cutting, captions, speed | Yes | Yes |
| MP4 export | QuickMovie logo + name watermark at the bottom right | No watermark |
| Save .qm project | No | Yes |
| Open .qm | Yes | Yes |
Pro subscription
- KRW 5,000 per month or KRW 50,000 per year (about 17% off versus 12 months at KRW 60,000 — two months free).
- Pay with the PayPal button via See plans in the export window, or in the plans window that appears when you try to save a .qm. Billing is in USD ($3.99 monthly / $39.99 yearly); the KRW amounts are for reference.
- It renews automatically until you cancel. Use the account button in the header → Cancel subscription any time; you keep Pro until the end of the period you've paid for.
10. FAQ
Are my videos uploaded to a server?
No. Video, photo and audio files are processed entirely in your browser and never uploaded. Only when you use voice cloning is that voice sample sent to an external server.
Which browser should I use?
Chrome or Edge on a PC is recommended. Safari can edit and preview but may not support MP4 export (WebCodecs).
Fetching my blog URL does not work.
Some sites block outside access. In that case add the photos yourself, paste the paragraphs and use "Distribute text" for the same result. Only use your own writing.
Export fails or is slow.
Longer videos take longer. For long sources, keep only the part you need before exporting. Use an up-to-date browser and close other heavy tabs.
Can I re-edit an exported MP4?
An MP4 has captions and sound merged, so they cannot be separated. If you may edit again, also save a .qm project when exporting. Reopening it restores video, captions and sound as separate layers.
Is it free?
Editing is free and needs no login. MP4 export works after a free sign-up with a watermark; removing the watermark and saving .qm are Pro (KRW 5,000/month or KRW 50,000/year).