 QuickMovie
How to Turn a Blog Post into a Video in 5 Steps
QuickMovie Team · 2026-10-10
If you already have a blog post with carefully written text and photos, you can turn it into a video without writing anything new. The photos and sentences you published are the raw material. This guide walks through the steps for turning a blog post into a short vertical video with QuickMovie.
1. Pick the post
Not every post suits video. Posts with many photos and short paragraphs (travel logs, restaurant reviews, product reviews, recipes) work best. A post with one or two photos and long text becomes monotonous on screen. Ask whether the post can be told as "one photo, one or two sentences".
2. Paste the address and split it into scenes
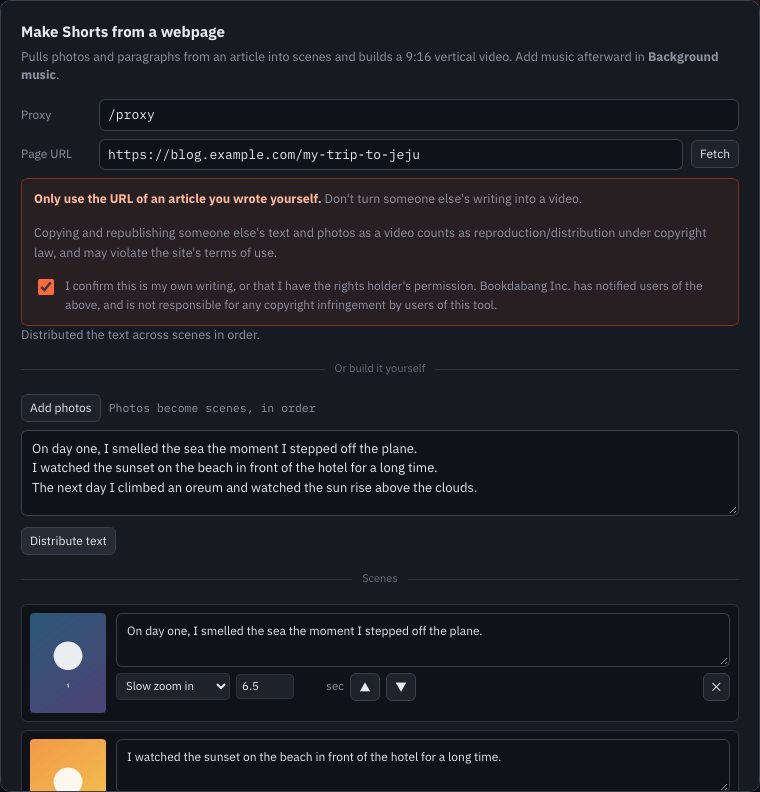
Under Webpage → Shorts at the top of QuickMovie, paste the post's address and press Fetch. The photos and paragraphs are split into scenes: each scene is one photo plus the text shown under it. If a site can't be fetched, add the photos yourself and paste the paragraphs to get the same result.
3. Shorten the text for video
Blog sentences are written to be read and are too long for subtitles. Keep each scene to two lines of about 15–20 characters per line. Drop connectives and side explanations and keep the core. Shortening often makes the point of the post clearer.
4. Set scene length and motion
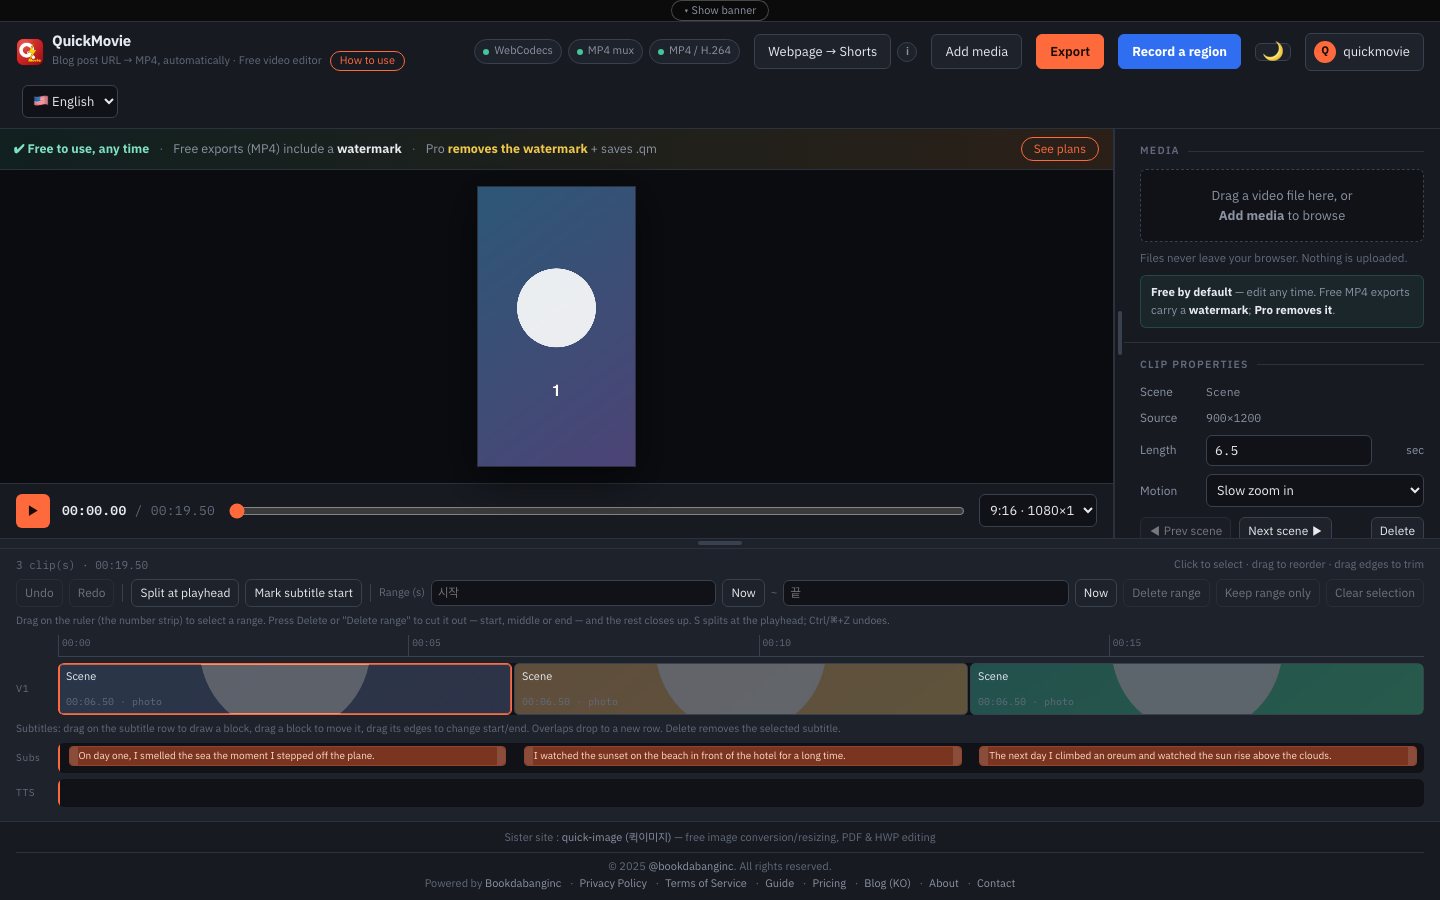
A photo only needs to stay on screen long enough to read its text once — usually 3–5 seconds. You can add a slow zoom or a slide-in to each scene; two or three effects used in turn look tidier than a different effect on every scene.
5. Add music and export
Once the scenes look right, add them to the timeline, put on background music and save as MP4. If you plan to edit again, also save a .qm project: video, captions and music layers are preserved so you can change only the text next time.
A note on copyright
Use this only with your own writing and your own photos. Turning someone else's text or photos into video may infringe copyright. Check that your background music is licensed for your use as well.
Workflow example: three photos, three paragraphs
Take a short post with three photos and three paragraphs. You enter the address, review the scenes, trim the text and add them to the timeline. The step that takes the most effort is not technical — it is shortening the text. Left as is, a blog sentence puts too many words on one scene and makes the video feel heavy. Aim for one sentence per scene, short enough to read in one breath.
Common mistakes
- Not checking photo order: skim the scene list to see the order matches the story. Use ▲▼ to reorder.
- The same duration for every scene: a slightly shorter first scene and a slightly longer key scene creates rhythm.
- Mixing portrait and landscape photos: landscape photos leave bars above and below on a vertical screen. Compare 'Letterbox' and 'Fill' per scene.
- Skipping the rights check: confirm that the text, the photos and the music are yours before uploading.
This article is based on the actual screens and features of the QuickMovie editor. Platform policies and numbers can change, so check the latest guidance before you upload.